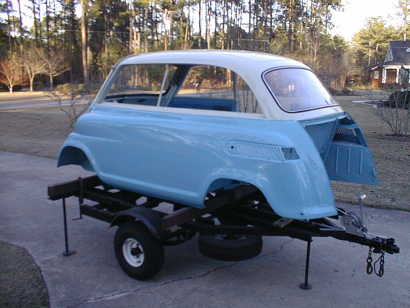
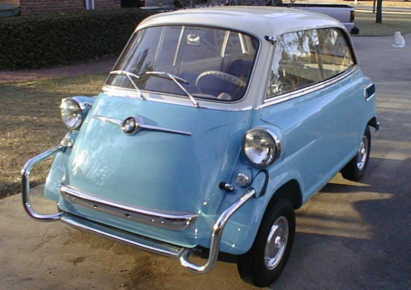
The first picture shown on the left was taken in 1983. This is 1 of 3 cars that I purchased that day. As mentioned on my "History of my Isetta" page, this was the worst of the cars. I took this body and the chassis from another to "create" one complete car.
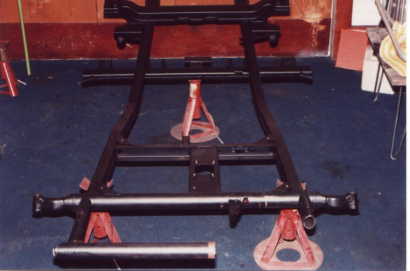
This photograph shows the chassis that was taken from the car that was used as a "fertilizer storage barn". Even with this abuse, the chassis was in remarkably good condition except for the area around the pedals. As you can see in this photograph, the chassis at this point had been sand blasted and painted. Also the section of the pedals has been removed and the ends prepared to accept a replacement pedal section.
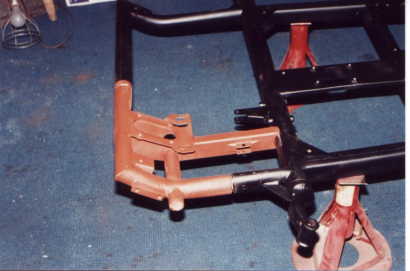
In this picture, a section of the chassis from the yellow car was used to replace the damaged area in this chassis. The yellow car's chassis had been cut in 1/2 by the previous owner and the rear section was missing. Fortunately, the front section was "part of the 3 car purchase".
After the chassis was repaired, I continued to restore the chassis and running gear. All the brake cylinders and master cylinder were replaced. The engine from the yellow car which was found laying on the ground under the body in the picture above was dismantled and restored. Very little work was required on the internals of the engine except for a good cleaning. All of the mechanical work on the chassis was completed in approximately 1 year. The chassis was then outfitted with a seat and steering wheel and tested like a "dune buggy". Problems with the transmission were discovered and the transmission had to be dismantled and repairs made. Upon completion of these repairs, the chassis performed well.
The next step was to restore the body. Simple, right? Well, not really. Most of the rubber parts needed for the project were not available or I didn't know where to locate them. I was stuck. I did continue to do some body straighting and rust repairs, but basicly for 17 years the chassis and body sat in my shop with little being accomplished. Then by chance I attended the Microcar & Minicar Clubshow in Asheville, NC where I made several key contacts. The project was "on" again.
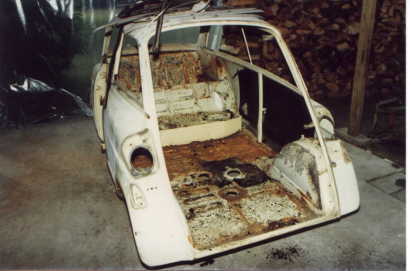
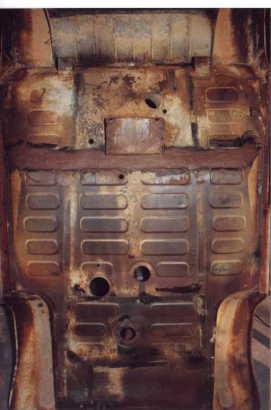
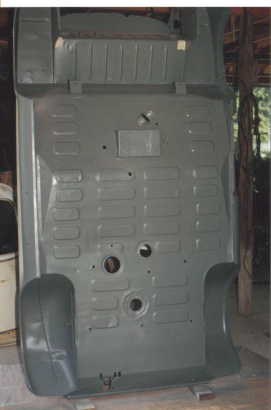
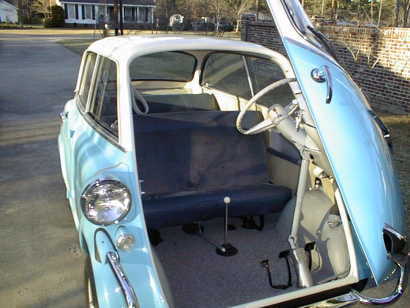
These next 2 photographs on the left were taken in 1983 when I was begining to strip the body of its glass and other parts. The floor pan was in very bad condition. There were many holes in the floor and the rear seat support was completely rusted from the floor pan. Extensive repairs were made to the floor area.
Prior to making the repairs, the entire inside and bottom of the body were sand blasted to remove any loose rust and old paint.
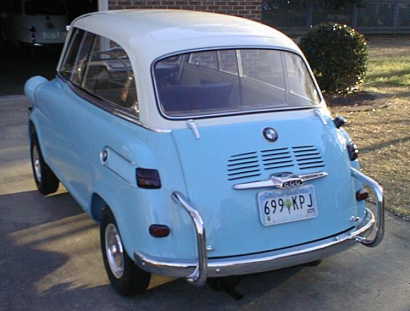
Notice near the rear of the car is the side BMW emblem. Most of these emblems were still with the car, but like most were badly deteriorated. These were made of a white plastic base with a painted clear cover. I point this out because I am very proud of the way they turned out in my finished car (they were restored and reused, see photos at bottom of this page).
The pictures on the left and right show the bottom of the body prior and after sand blasting and priming.
The areas around the gear shift opening was re-inforced and repaired due to excessive rust damage.
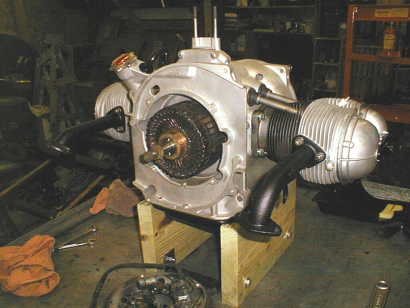
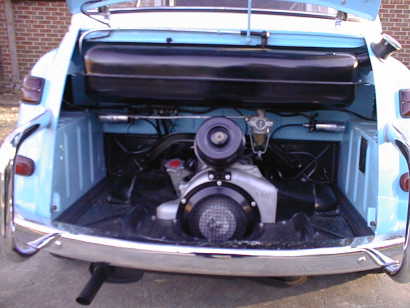
In order to maintain matching serial numbers between the chassis, engine and body; I decided to rebuild the engine which serial number matched the chassis I used. A picture of this engine is seen at the left prior to any work being performed.
Work began on this engine on June 28, 1999. The sheet metal on the outside of the engine as in fair shape with the exception of the 2 side pieces that fit between the engine and the side of the body. They required extensive repairs.
The first problem was noted when I attempted to remove the armature from the crankshaft. I was concerned that I would have to fabricate a jig to hold the crankshaft from turning in order to loosen the holding bolt. This was not required since the crankshaft could not be turned. I removed the armature and field coils and they appeared to be in good condition.
I continued by draining the oil from the engine. Only a few drops came out of the drain plug. I then removed the oil pan to find that sludge had built up within the pan to a thickness of about 1/2".
To make a very long story short... This engine was in terrible shape. Every part of this engine was frozen. It took about 1 month to disassemble the engine. Very large quanities of penetrating oil was used, but finally, the engine was disassembled. The crankshaft was trash. The connecting rods were rusted to the journals. I rebuilt the crankshaft myself by replacing the rods and journals. This is a job I would not advise. If you have this problem, do yourself a favor and purchase a rebuilt crankshaft.
This photograph shows the case after it has been cleaned and the rebuilt crankshaft installed with the new rods and journals.
At this point the cylinders have been reinstalled and the heads rebuilt. The field and armature were tested and are being reinstalled.
At this point the carburator, exhaust system and cooling duct system had been installed. The intake pre-heat tubing between the muffler and intake manifold had not been fabricated. These were later fabricated and installed.
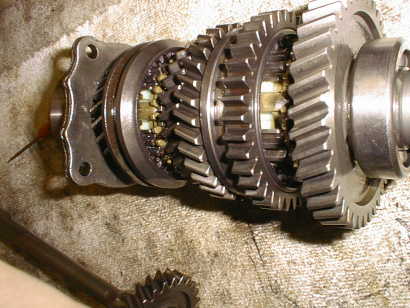
Next the transmission was completely disassembled and all seals and bearings replaced. Another problem was with the rubber limiters used with the synchronizer rings (the brass items in the gearset). The rubber limiters were completely missing. They had deteriorated over time. New ones were fabricated and can be seen in the photograph as the white items behind the synchronizer rings. These were made from a HMP material and work very well.
This photograph shows the gear set after it had been installed in the case. The main drive shaft is also in place, but the ring gear has yet to be installed.
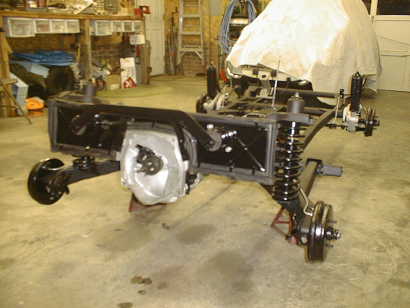
After much work the chassis was rebuilt again in 1999 - 2000. This rebuild was a complete rework of what was done 16 years eariler. The picture on the right shows it after it had been completely disassembled, sand blasted, repainted and reassembled. Fortunately the brake cylinders were in good condition. I attribute this to using silicone brake fluid during the first rebuild. The car in the background under the blanket (South Carolina car cover) is my 1957 white SW 300 Isetta.
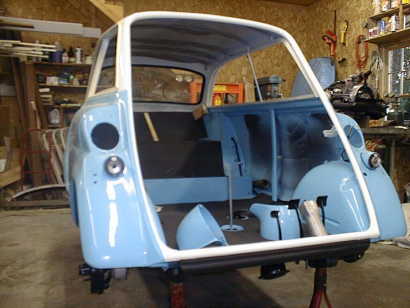
At last the time has come to start the reassembly process. I had the body painted at a local body shop and took it to the shop in pieces. They striped the body down to metal and repainted the inside, outside and bottom. The front and rear window glass was installed by the body shop after painting (this is no job for amateurs)!!
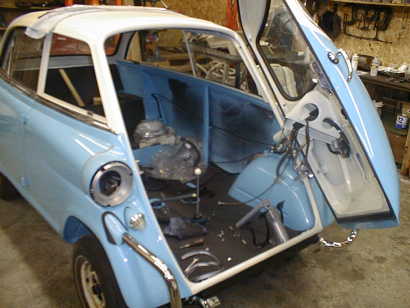
Now with the body installed on the chassis I began the process of installing all the parts.
First the wiring harnesses were repaired and installed and then all the electrical items.
One of the more difficult parts of the interior was the restoration of the dash. After some minor repairs and much sanding and painting, the dash was ready to install.
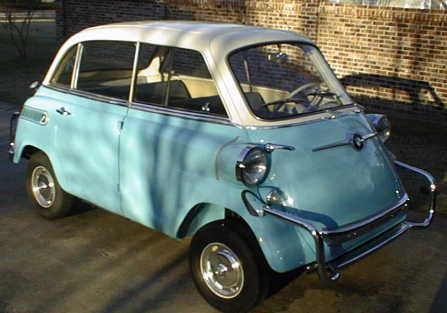
Hours and hours of polishing of the aluminum trim pieces and much expense for the chrome at the re-chrome shop has paid off in the finial product.
Each of the plastic emblems were disassembled and carefully cleaned and polished. The inside of the plastic covers were hand painted and then reassembled.