The original interior panels made by BMW were simply a textured cardboard. The cardboard was the finished surface, no fabric or material covered the cardboard. They made at least two designs of this cardboard. One was a basket weave pattern and the more common pattern was a leather like grain texture as shown below.
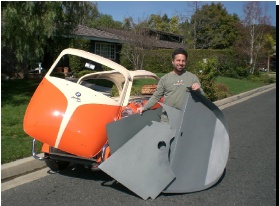
Keep That Original Look and Feel of Your Classic Isetta!
You have worked hard restoring your Isetta and very proud of your accomplishment. Just look at that shiny new chrome. People look at your car in amazement. They may ask if it’s restored to original specifications. But having the correct interior panels and vinyl seat material like BMW did 50 years ago
has been unavailable.
…UNTIL NOW!!
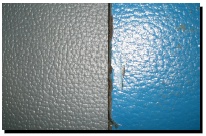
New Cardboard Original BMW
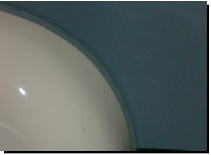
The gray textured material on the left is what I have found to reproduce the panels with. The blue on the right is a piece from an original panel BMW made some 50 years ago. You will notice the grain is quite similar. The gray material is over 15 years old and a very limited supply is available. Many people ask if the cardboard comes in different colors. BMW painted the cardboard the appropriate color, so it comes in any color you want to paint it.
How They Did It
I am not sure exactly how BMW made the panels, but presumably they used large presses to stamp out the patterns. There are certain folds that must be made on the rear parcel shelf and deluxe door, again probably large presses and maybe heat or steam were used to make these folds. The rear parcel shelf and deluxe door were assembled with rivets. The toe kick and map pocket were attached to the door panel or side panel for deluxe models. At some point they were painted the appropriate color.
How And Why I Did It
This quest grew out of a desire to restore my Isetta as original as possible. I did not want interior panels covered with fabric simply because that was not how it was done. After doing some research it became apparent that no one was reproducing the panels with the same look and feel BMW did originally. First I had to source the material and found a very limited supply of textured cardboard. Then I had to figure out how to cut the material. Making dies to use in large presses would have been cost prohibitive. Many methods were tried and failed including making patterns, a router, sanding and files. It was finally determined that the only acceptable method to get clean repeatable cuts was using a CNC (computer numerical control) machine basically a cutting device that is controlled by a computer. This meant all the patterns had to be drawn in a computer using a CAD (computer aided design) program. Many test cuts and fine-tuning were required to get the patterns just right. While the patterns were undergoing development, research was going on to determine how to best make the appropriate folds in the cardboard. Again many methods were investigated before acceptable results were obtained. Once I had the pattern just right, the design was sealed and production was started.
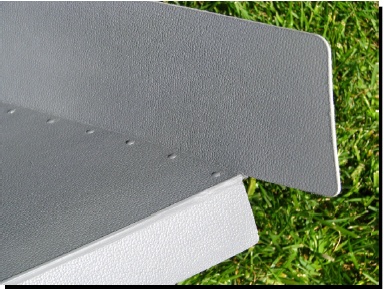
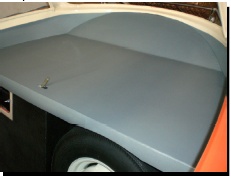
The next step after, getting the cut panels is assembly of the rear parcel shelf. The rear parcel shelf is riveted like the original…only I think better. A few changes were made compared to the original rear parcel shelf. First, on the side or wing panels, notches were made to relieve any compression of the material that is caused when it is assembled. This probably was not necessary originally due to the large machinery that was used by BMW. Washers are added to the backside of the rivet for extra strength. Finally glue is applied on the folds also for added strength.
Notice the attention to detail. This is riveted just like the originals. Several steps are required to get the cardboard to bend without tearing.
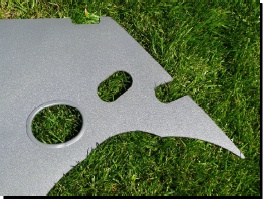
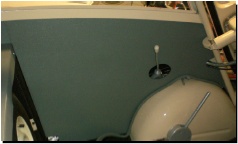
This picture shows the cut outs for the shifter, defroster and wire conduit Moulding is added around the shifter hole like the original panels had.
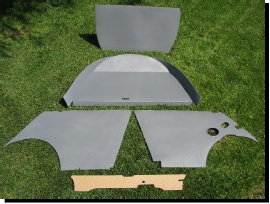
What you Get
When purchasing this Isetta interior set you receive the rear parcel shelf completely assembled, both side panels, with or without the defroster hose cut out and the front door panel all made out of the textured cardboard material. You also receive the under seat panel that hides the battery. This piece is made out of hardboard or Masonite like the original piece. Of course complete installation instructions are included. Look at the picture below to see the complete panel set.
But Wait, There is More!
The restoration would not be complete without the correct vinyl for the seat and map pocket and I have what I believe to be the closest reproduction available. There are many options you can choose from when ordering a interior package. Anything from a complete set ready to install with a correctly sewn seat cover to panels ready for you to paint. Call and we can discuss what options will work best for you.
The End Result
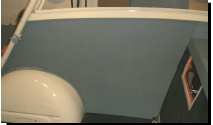
The end result is you end up with an interior panel set that is very much like the factory original and keeps your restored Isetta the way BMW intended it to be.
What if I want a more modern look?
If you want to cover the panels with fabric, I can provide panels cut out of smooth black cardboard ready for your upholsterer to finish with the material of your choice. Even though I am a purists, I will provide these with a smile.
Please feel free to contact David with any questions you may have! This page is provided as a service to Isetta owners and David free of charge. Please contact David directly at the address below for information and pricing.
Original looking custom made interior panels by David Raab.
Dave has produced an instructional video on how to install these panels. To see You-Tube video of the installation, click here.
Please feel free to contact David with any questions you may have! This page is provided as a service to Isetta owners and David free of charge. Please contact David directly at the address below for information and pricing.