This page describes some of the work that is required to rebuild the Isetta 300 transmission. This service follows the procedures described in the maintenance service manual for the Isetta. If you do not have the technical knowledge or tools to dismantle, inspect and reassemble a manual transmission, I can perform this task for you. If you believe you can tackle this task, this page will give you more insight than the manual does and help prepare you for this job.
Most transmissions are received complete and undisturbed. This is by far the most desirable and least expensive option when considering a rebuild. If the unit has been opened and partially dismantled, the possibility of damage to components or loss of parts increases dramatically. Pictured above are two examples of transmissions that I recently rebuilt for customers.
Special attention is given to the shifter forks because any excessive wear in these areas can cause the transmission to "jump out" of gear while the car is in motion. It is difficult to see in the photo, but the shifter fork on the left had to be reconditioned due to wear on the lower fork arm.
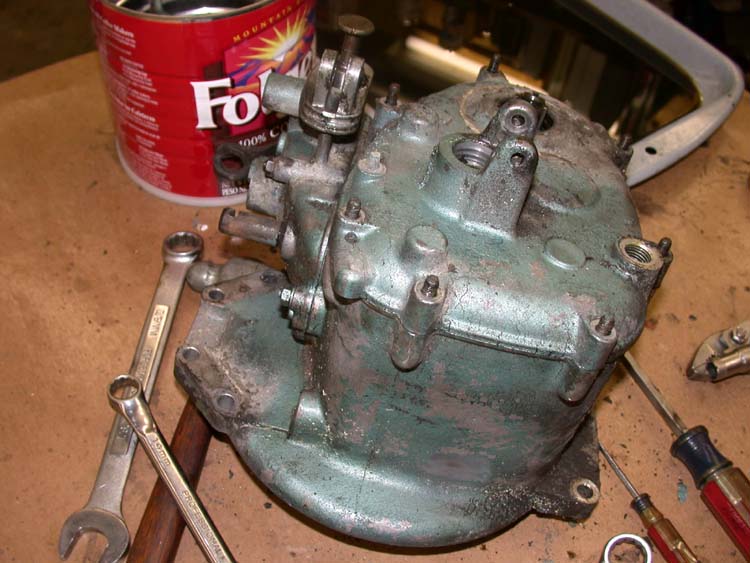
The first step is to drain any oil and open the case. It is important to locate and save the shims that are on top of each ball bearing. These (and perhaps others) will be required to set the bearing clearance when re-installing the cover.
The owner of this transmission was fortunate that the cover had not been damaged by loosen flex coupling bolts. It is not uncommon to find damage that extends into the bearing seats.
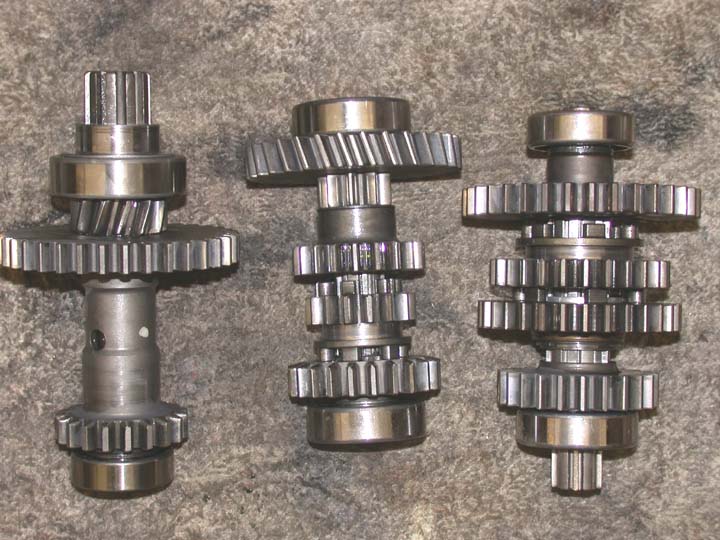
At this point the gear sets are removed from the case with the aid of a heater, and laid out for inspection. Each gear shaft is then disassembled and each gear is carefully inspected for wear or damage.
After the gears are thoroughly inspected and cleaned, the shafts are reassembled. The case is clean by bead blasting and thoroughly rinsed with solvent and then high pressure water. This is done to make sure all bead material is completely removed prior to the assembly.
The shifter control area is assembled and made ready to mate to the gearbox. The three gear sets are installed in the gearbox with the aid of a heater to heat the box up to approximately 170 degrees F.
The needle bearings inside the gear sets are inspected and replaced if found to be in questionable condition. In most cases these bearings are normally replaced. The input shaft is also given a very careful inspection and replaced with new one if necessary.The shaft shown below is in very bad condition and would be replaced. Typically new shafts cost about $250.00
The following is a cost estimate to rebuild a 300 transmission assuming no damaged gears, shifter forks, shafts, needle bearings, throw-out bearing, or extensive cover damage:
New Bearings (six ball bearings - needle bearings not included in this price)
New Needle bearing (as required)
Seals and Gaskets
Misc. boots and rubber parts, small items
Labor (includes all supplies, and overhead)
TOTAL ESTIMATE
Prices were last updated 2/13/2023 - Labor is firm until notice is presented on this web site. Parts prices are subject to change depending on suppliers pricing.
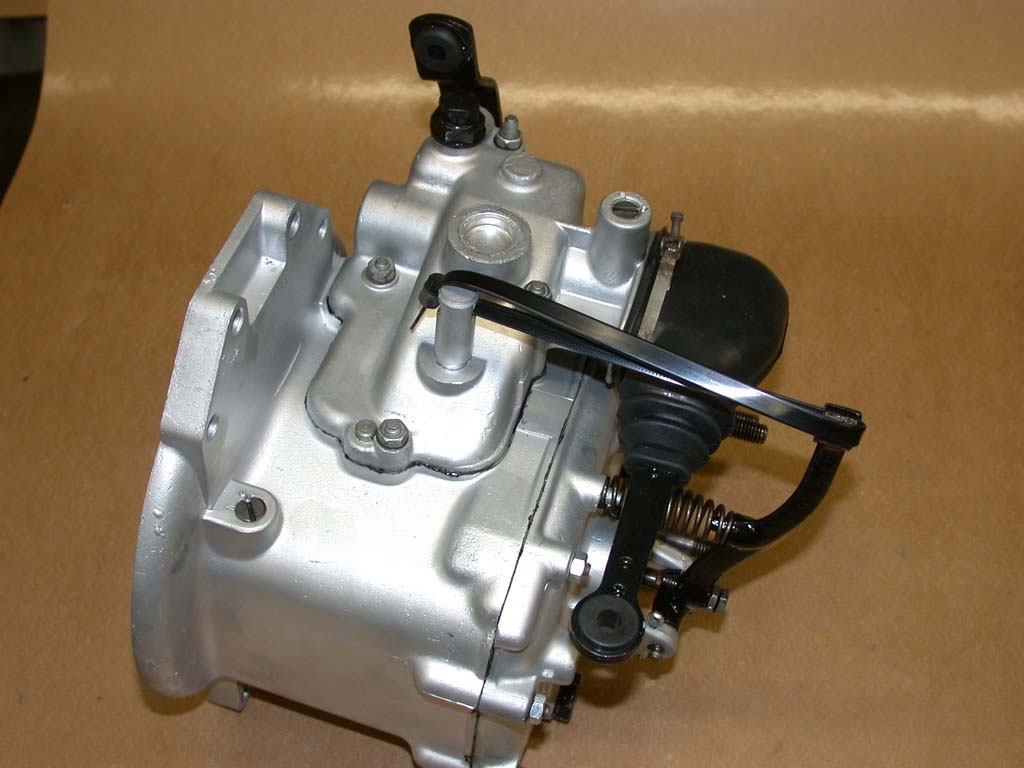
Below is a typical pictures of the 300 transmission after it has been reconditioned.
All work carries a 1 year warrantee.
If you wish to contact me to discuss this further, you may call me on weekends or week days between 10am and 9:00PM Eastern time. My cell number is 843-845-4742. Please do not call at "odd hours" and if I do not answer, leave a message - I will return the call.
$130.00
40.00
55.00
120.00
330.00
675.00
The last items to be installed are the reverse gear, and shifter forks. Then the shifter control box is installed on top of the transmission.
As the clutch arm is being installed the throw-out bearing is inspected and replaced if found to be defective. This bearing has many small pits and would not have lasted very long if returned to service.
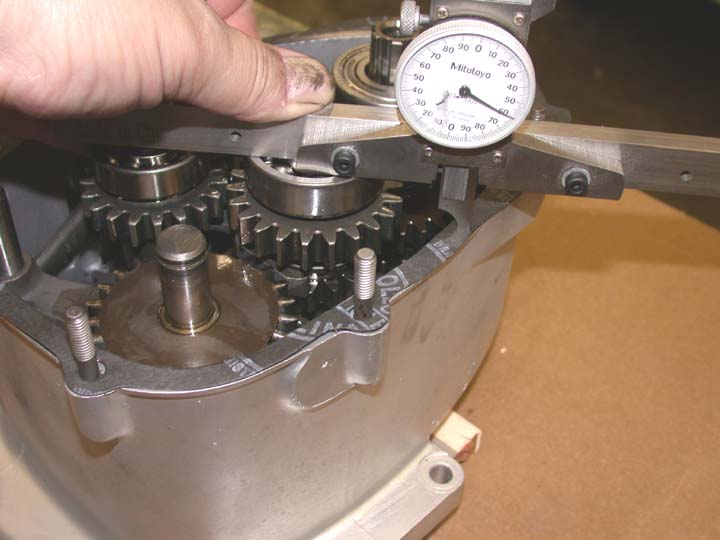
When installing the cover, the bearings must be shimmed for proper clearance. This is done with the aid of a depth gauge with the gasket in place. Proper shims are not available at bearing distributors and are getting very difficult to find. In most cases, the shims must be hand cut from shim stock and I do charge extra for shims that I have to add.
In this procedure, you first measure the distance from each bearing surface (outer race) to the gasket surface. Then measure the distance from the flange surface to the outer race seat in the cover plate. The object is to add sufficient shims to the outer race of each bearing to leave about 0.008" to 0.010" clearance. This clearance will be partly taken up in the compression of the gasket. Remember, the gaskets we use today (if you are getting them from any Isetta supplier) are much thicker than the original and will compress more than the originals. This is why I leave the 8 - 10 thousands clearance. Too much clearance and the gears are allowed to move in the case, to little, and you will cause the bearings to be bind when the cover is installed.
Due to illness, I am no longer providing any rebuild services. You should contact either John Wetzel at Isettajohn@aol.com or Werner Schwark at isettasrus@bellsouth.net